 English

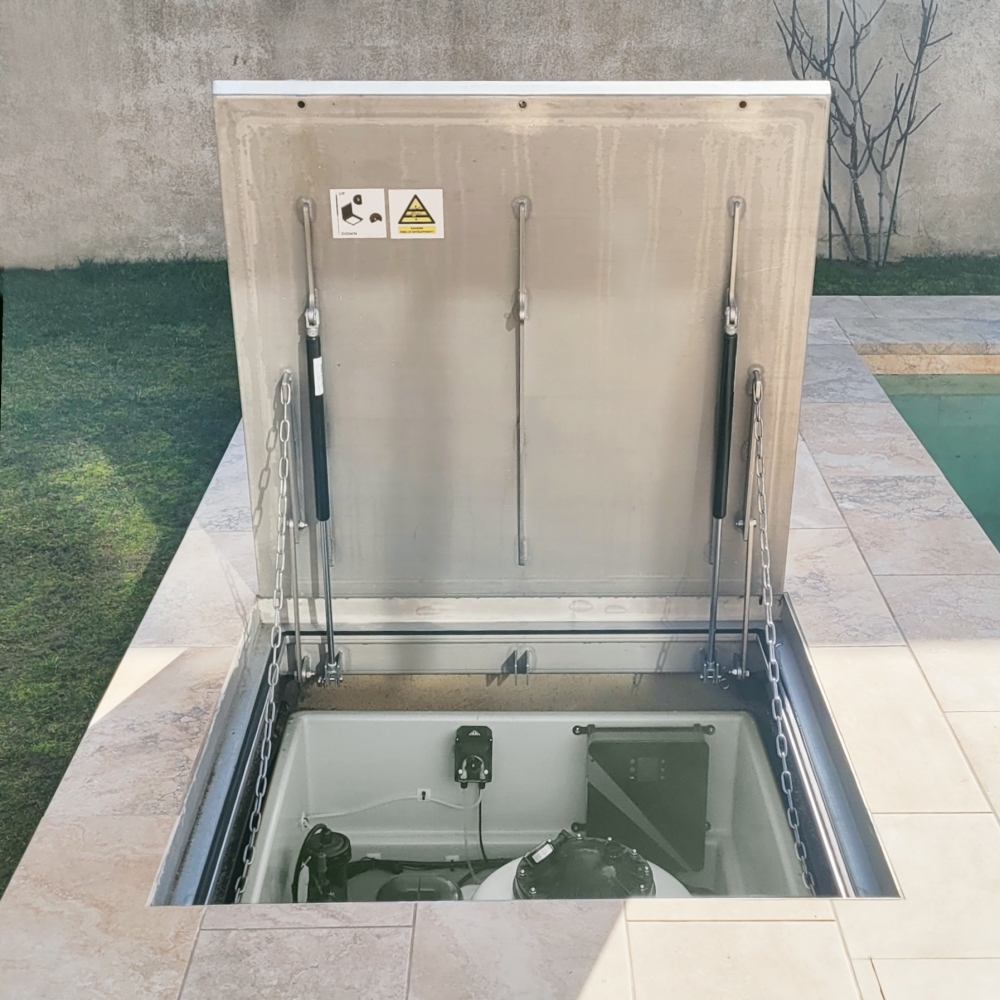
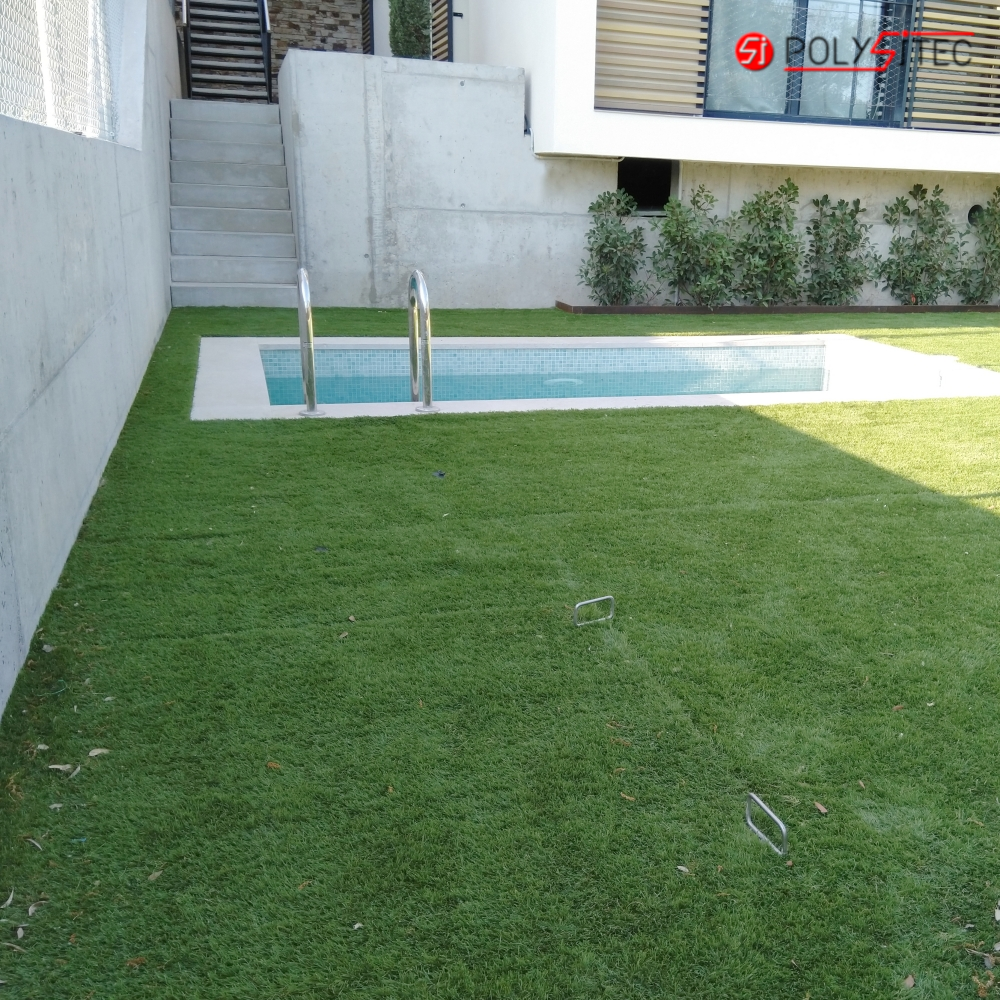
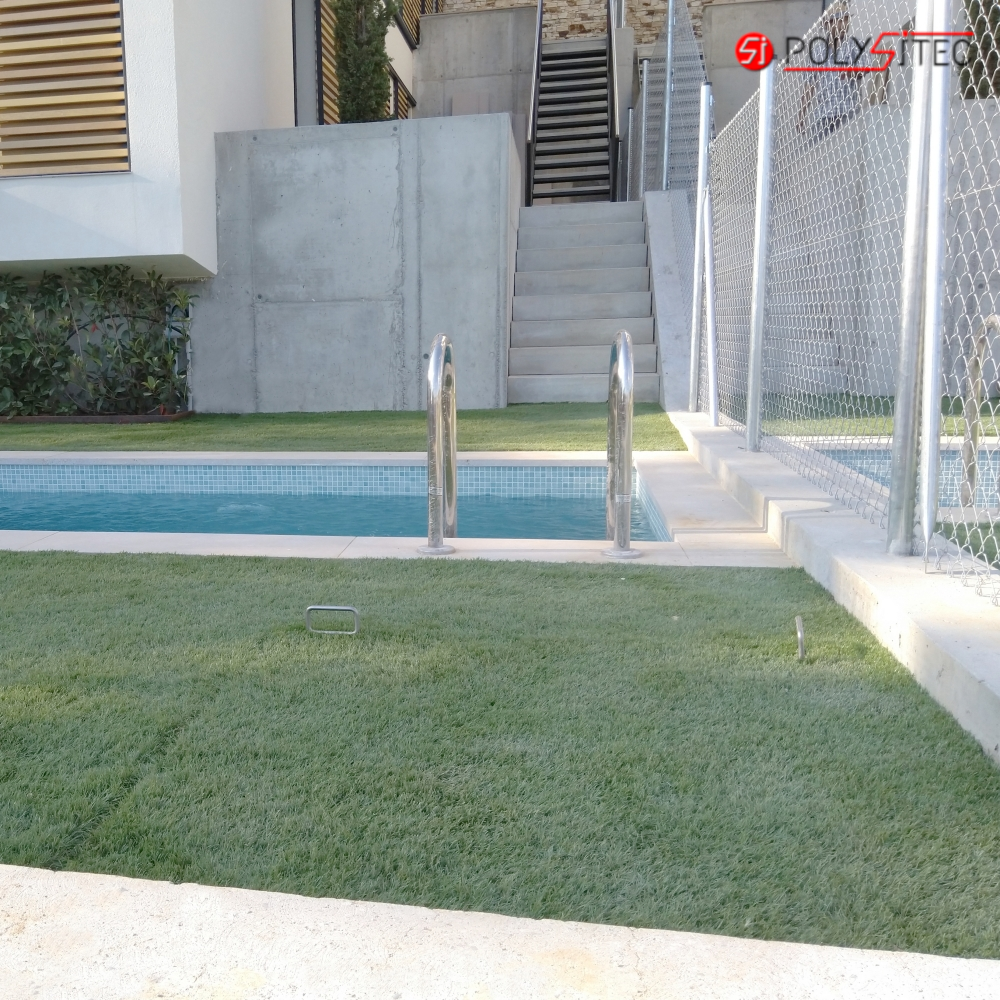
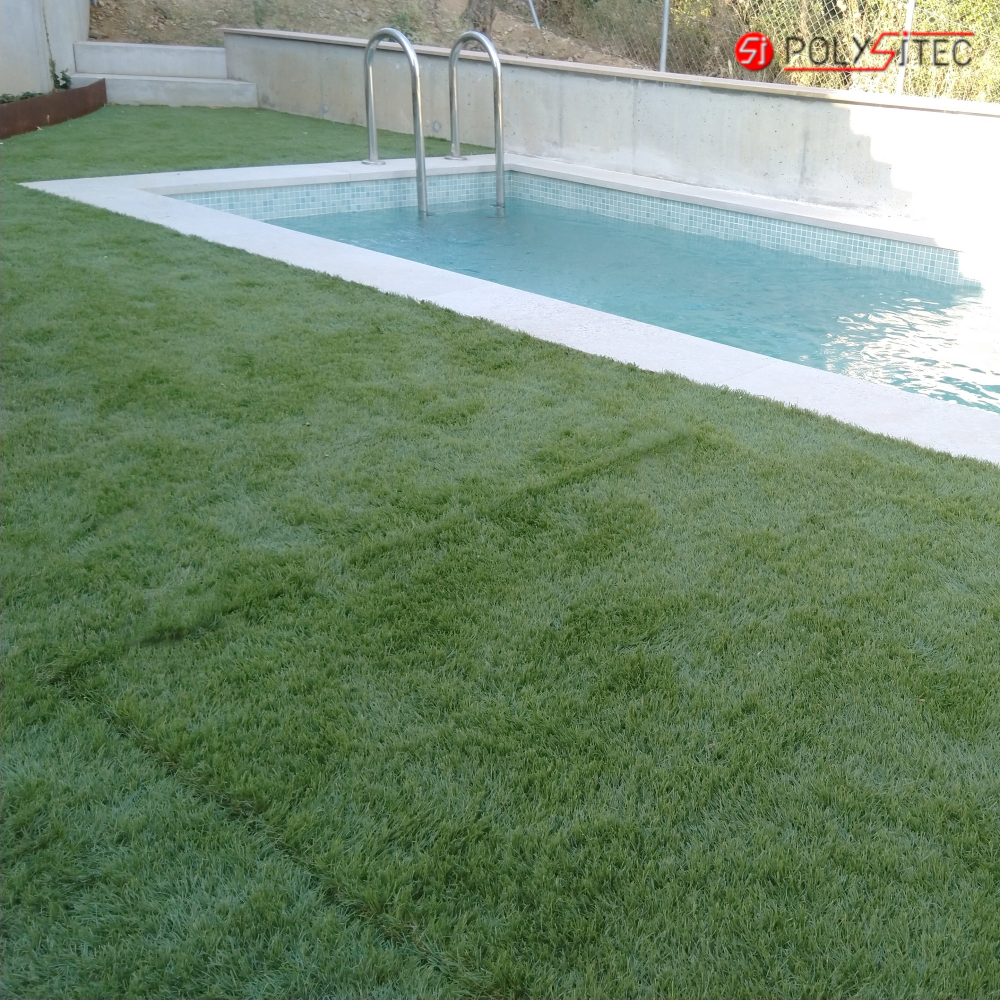
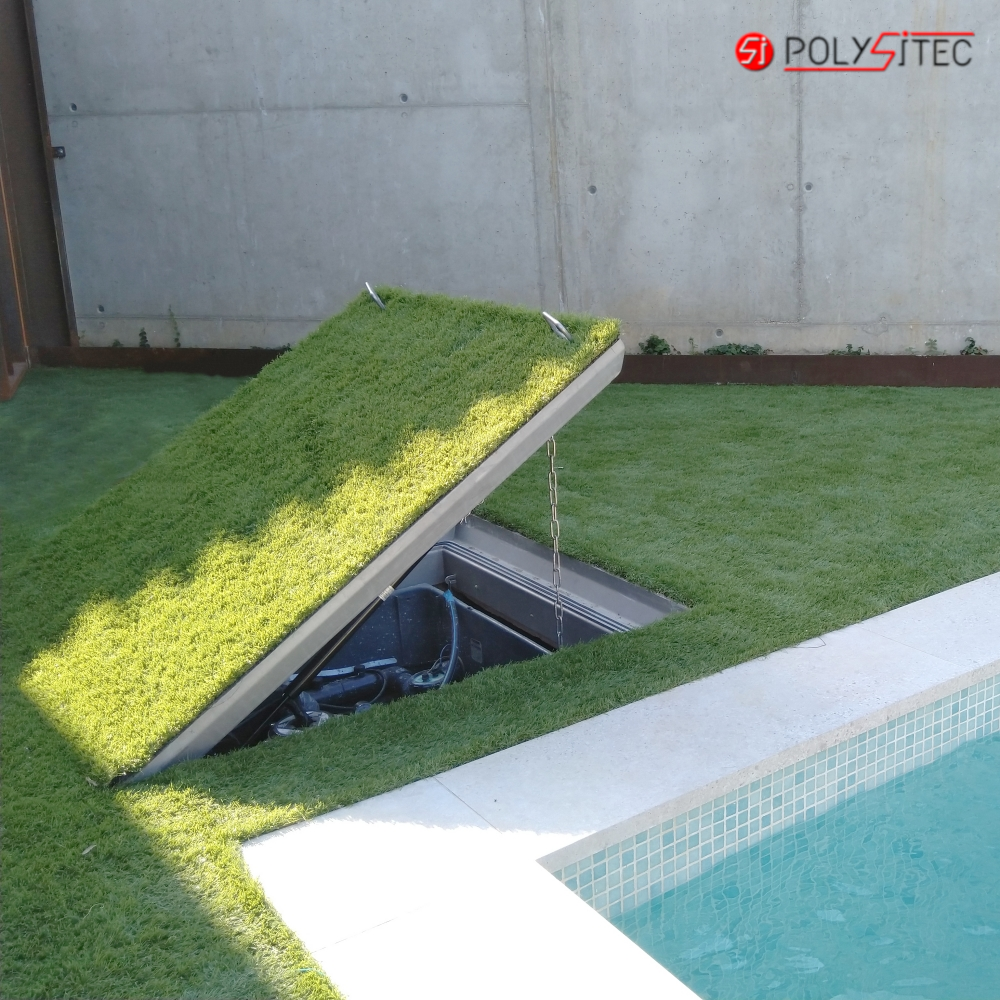
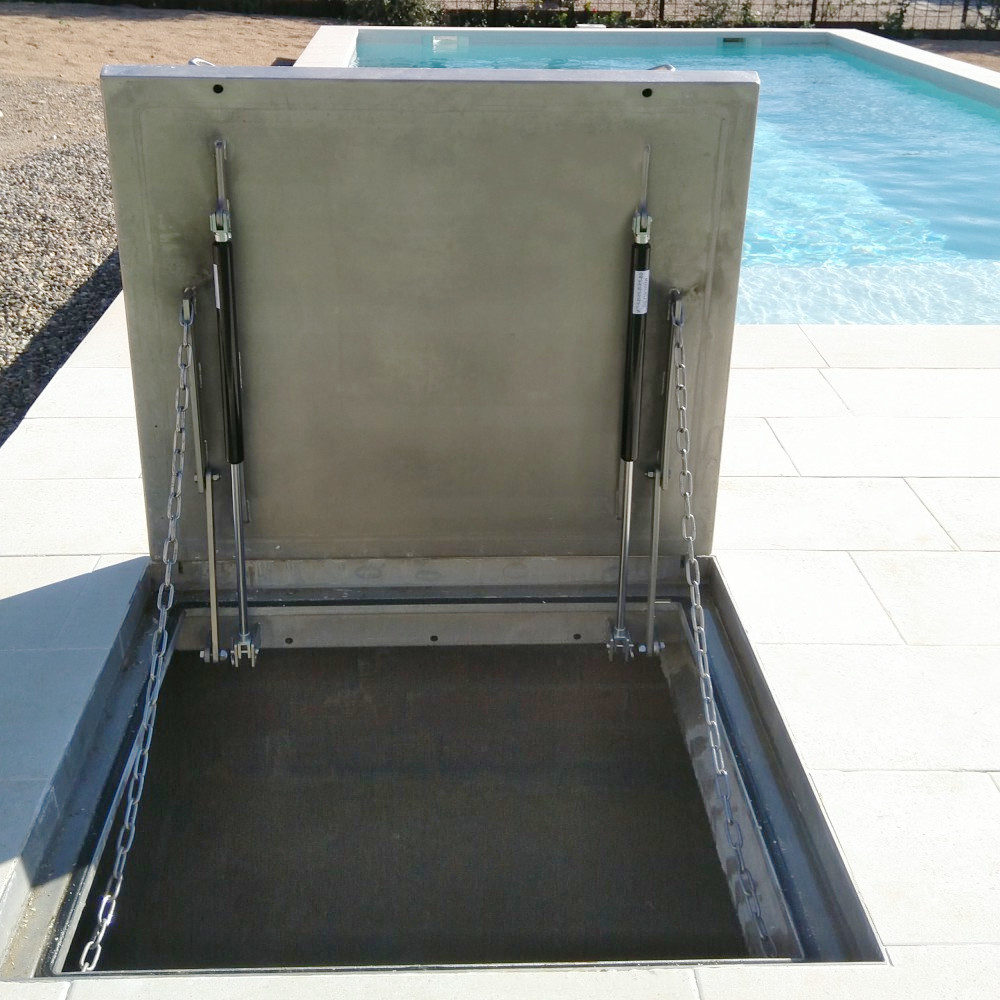
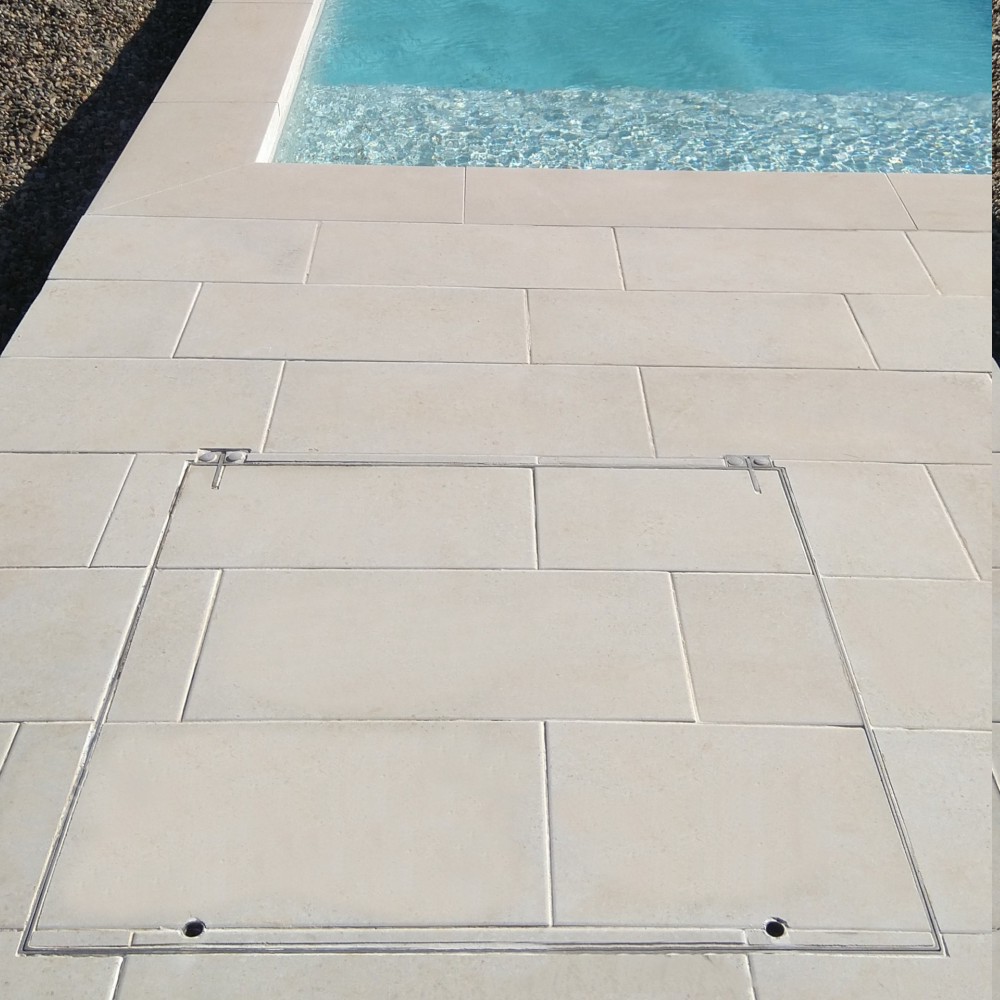
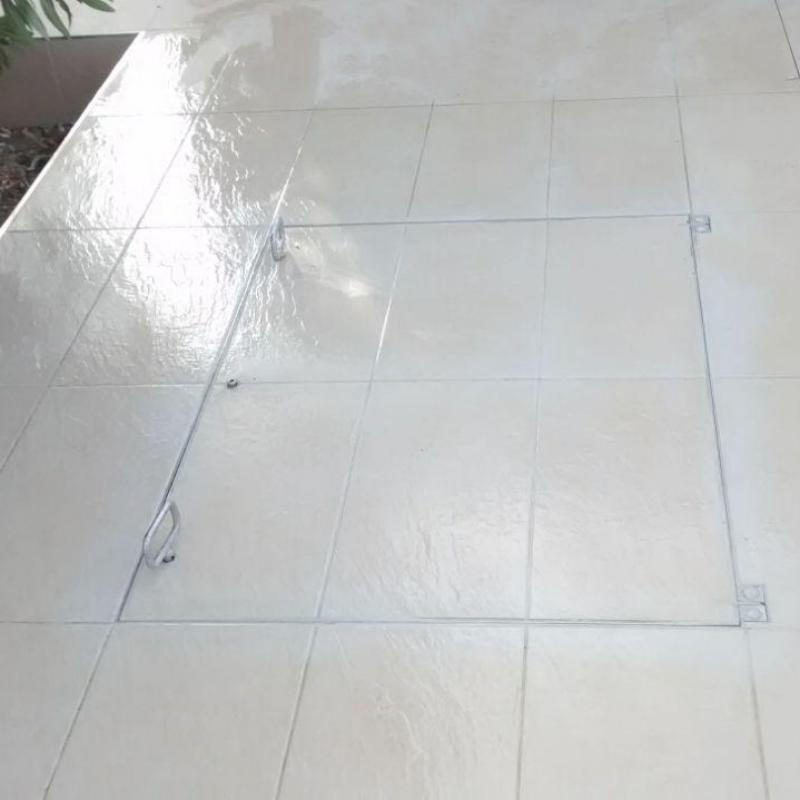
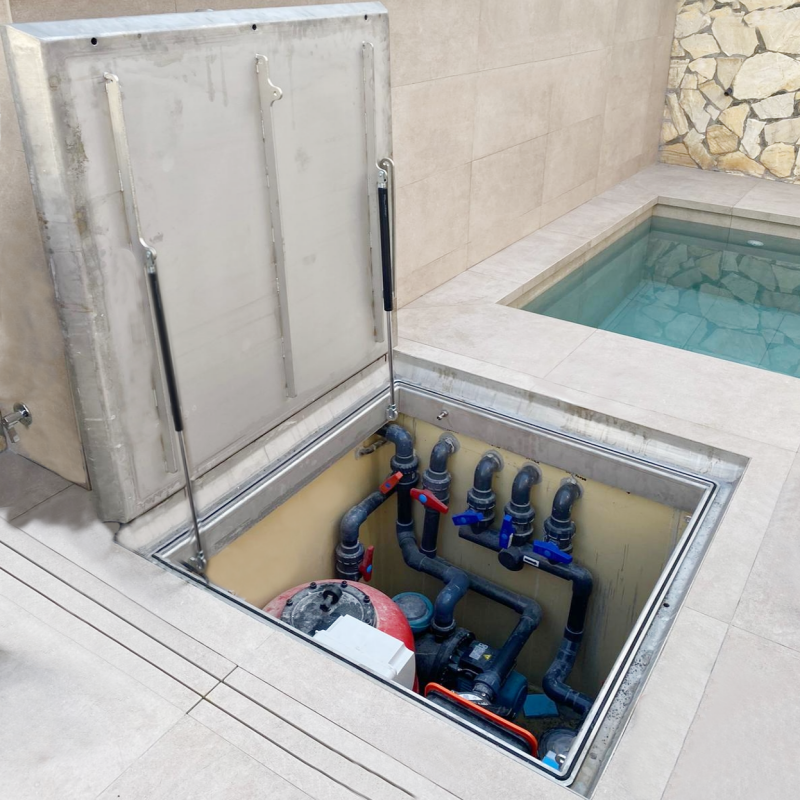
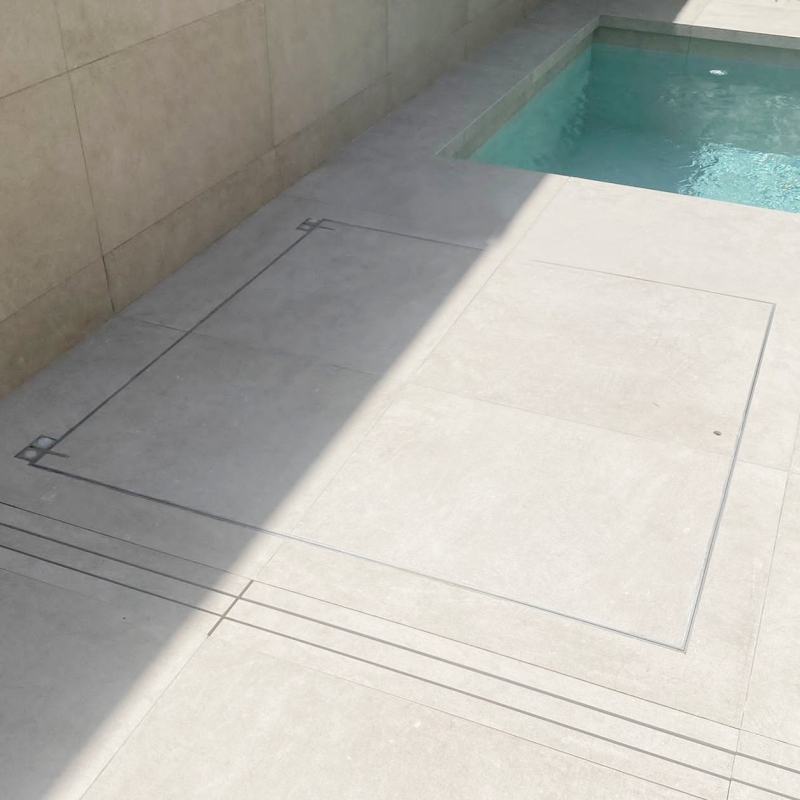
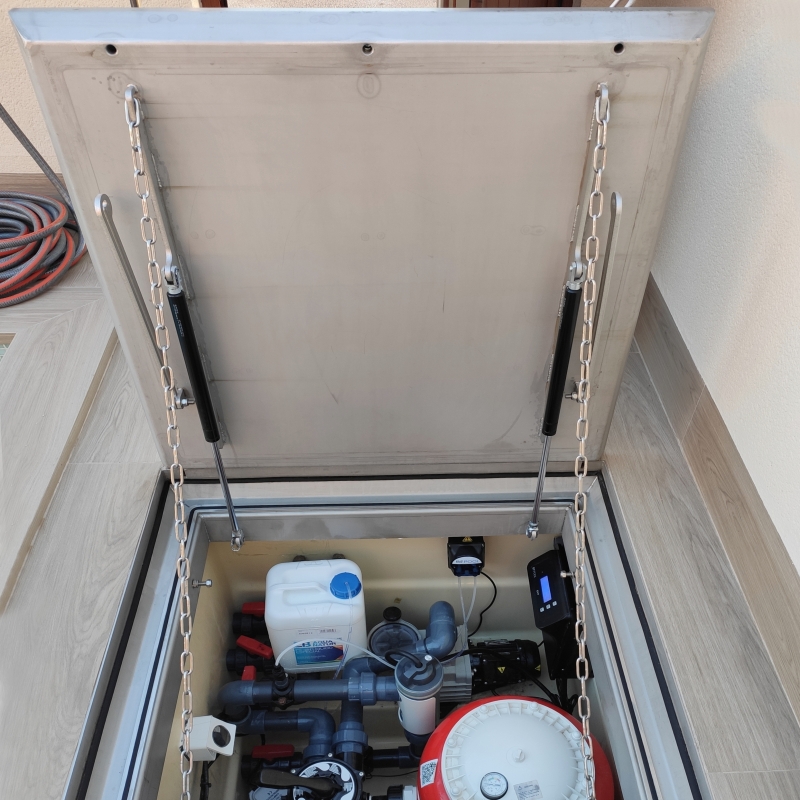
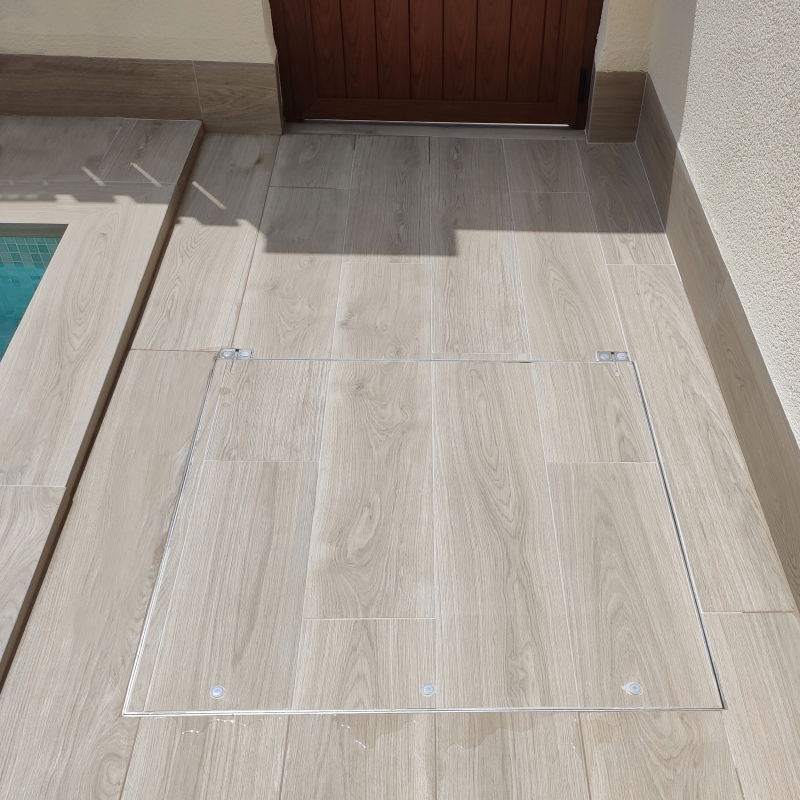
Polysitec® and its surroundings can bring you a wide selection of materials for the construction and equipment of swimming pools made of stainless steel AISI 316L: Drains, gratings, channels, Slotdrain, extendable vertical ladders with anti-slip steps. Assisted watertight hinged fillable covers, for form with the around pavement, providing aesthetics and functionality, for access to rooms of in-ground treatment plants and underground pool box, they minimize the noise of the filtration systems. With gas pistons and EPDM O-ring to ensure tightness. Customized and certified solutions !
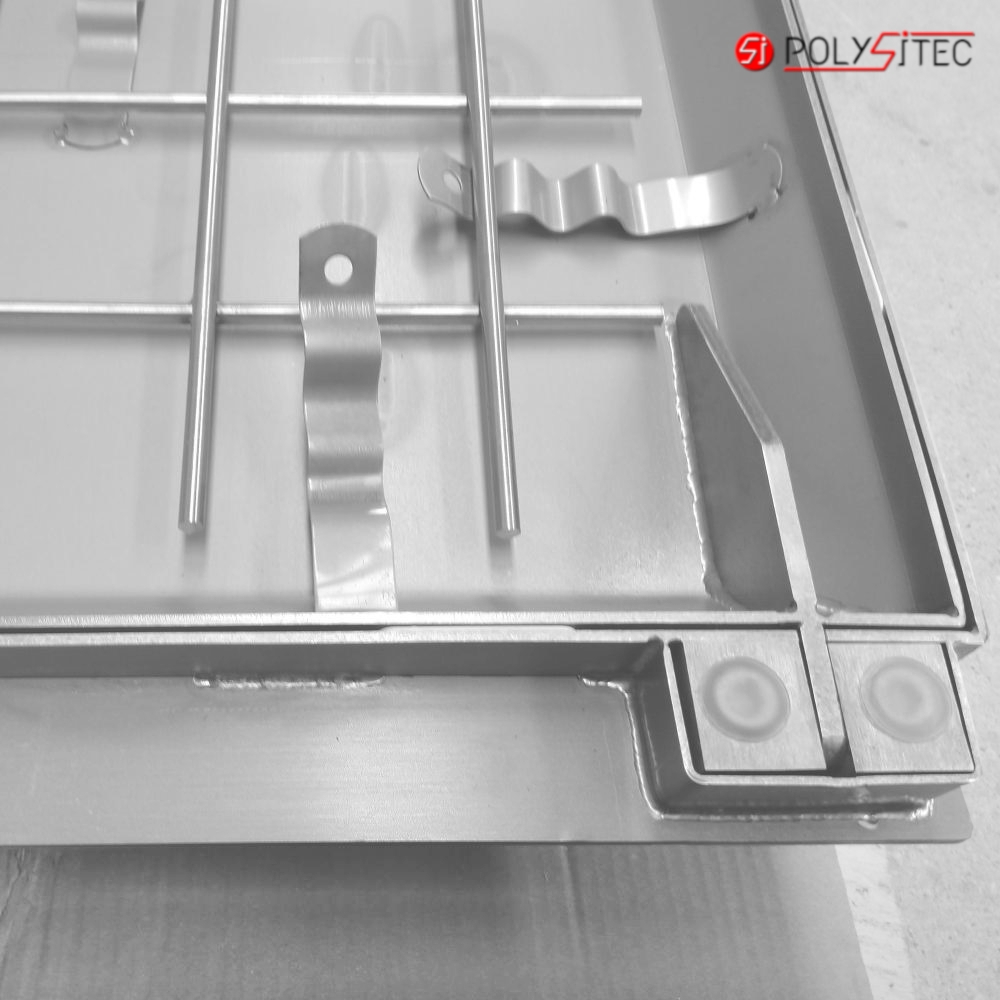
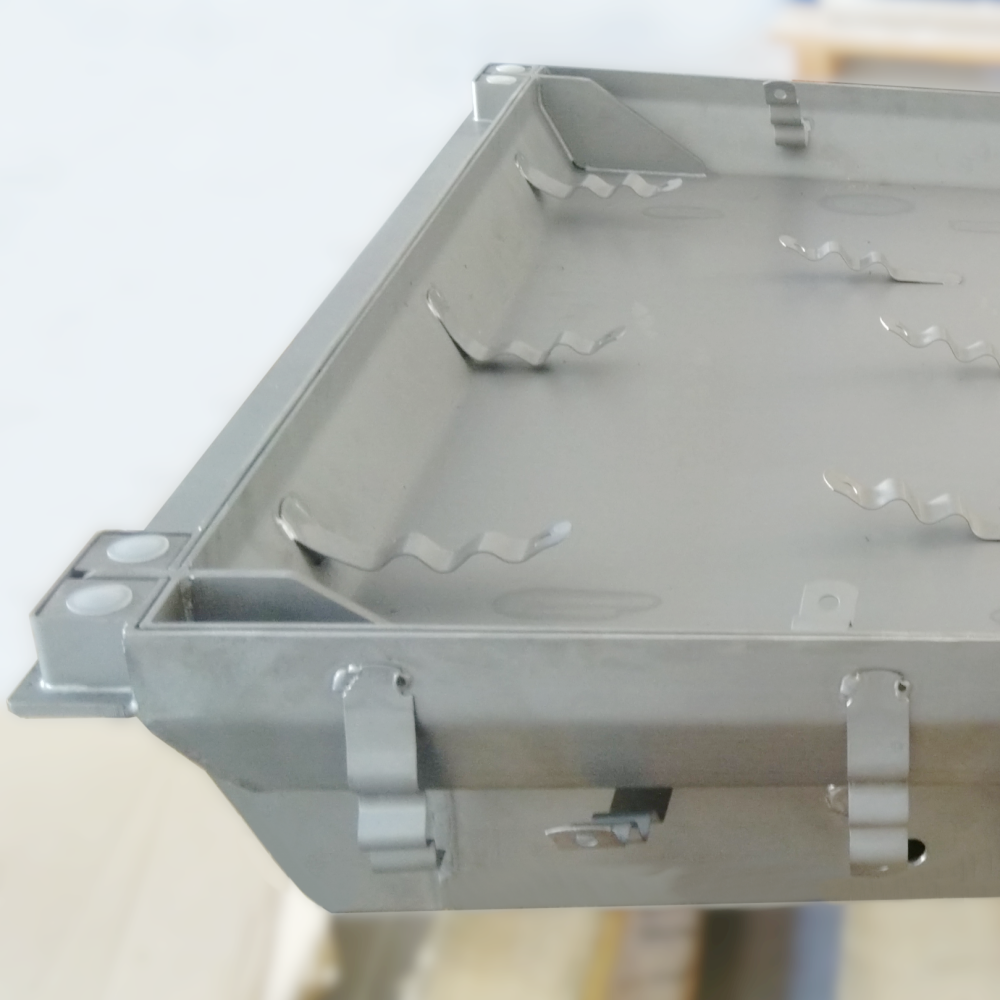
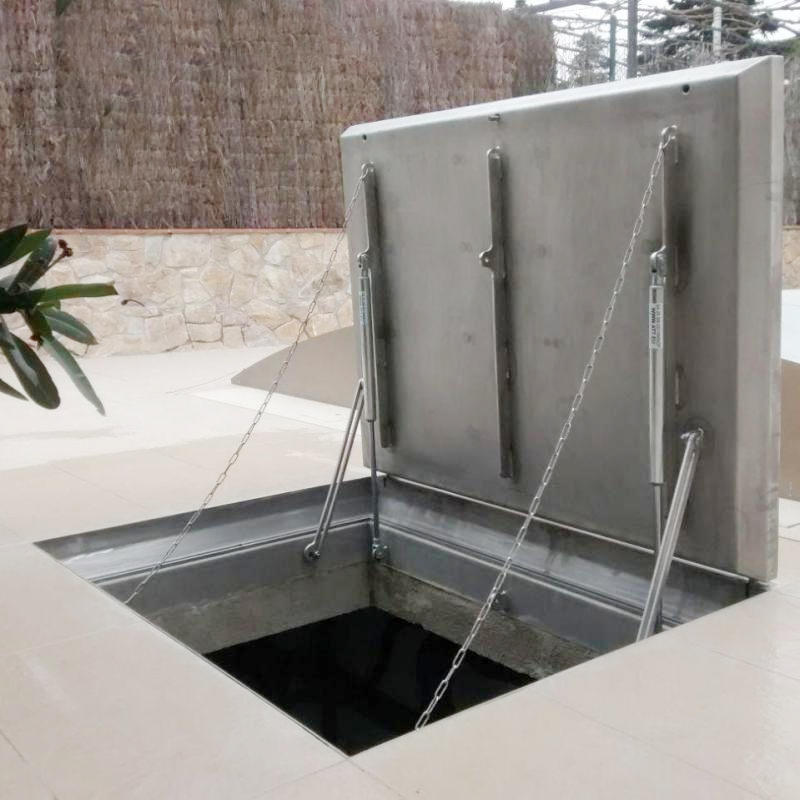
– A set of FRAME with sealing O-ring and hinged refillable TRAY is supplied, with gas pistons, mesh and screws; With Allen key, handles for opening and plastic gauges to use in the formwork process.
– Check the perfect condition of the assembly, there should be no bumps or deformations on the sides. Check the nut caps (they are made of black plastic or stainless steel). Check the gas piston heads and shaft.
– Installation and implementation must be carried out by qualified professionals. Handle with caution, there is a risk of entrapment between the frame and the refillable tray.
-

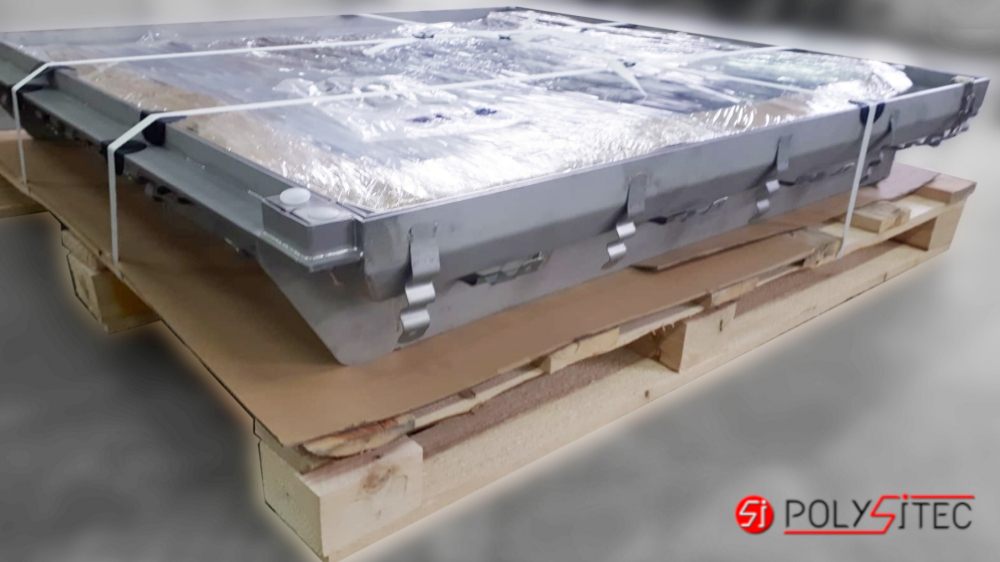
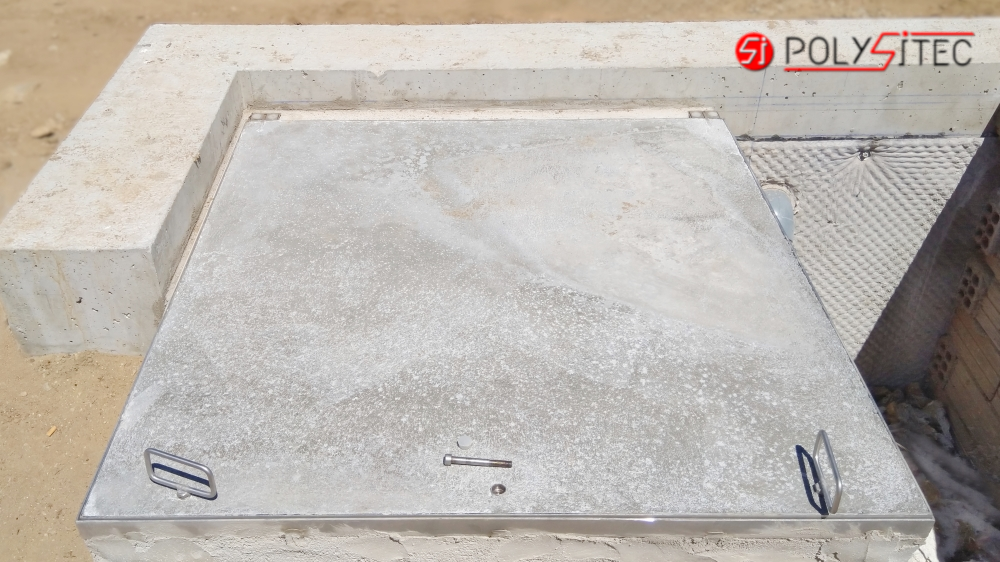
- Palletized assisted cover
-
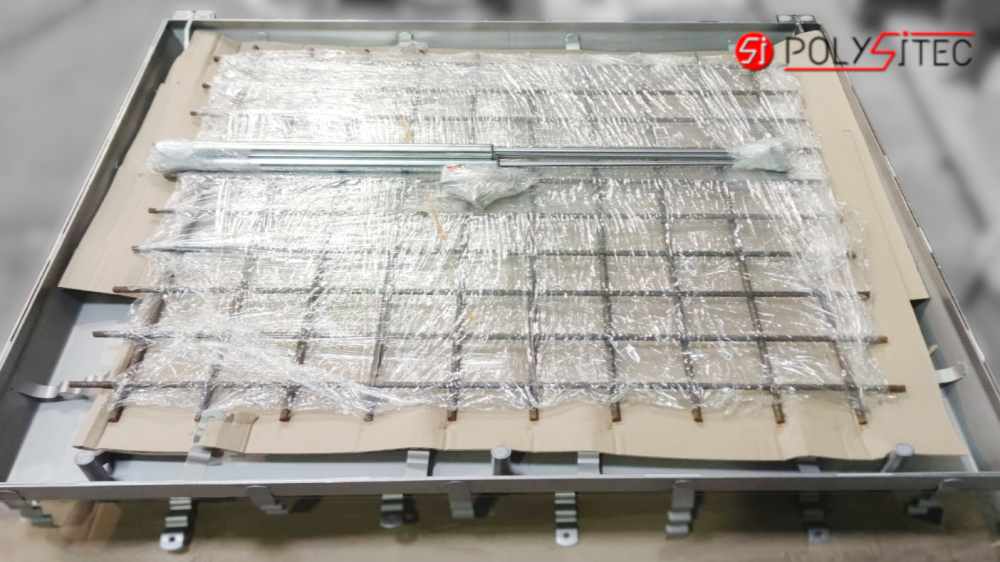
- Verified assisted cover
-
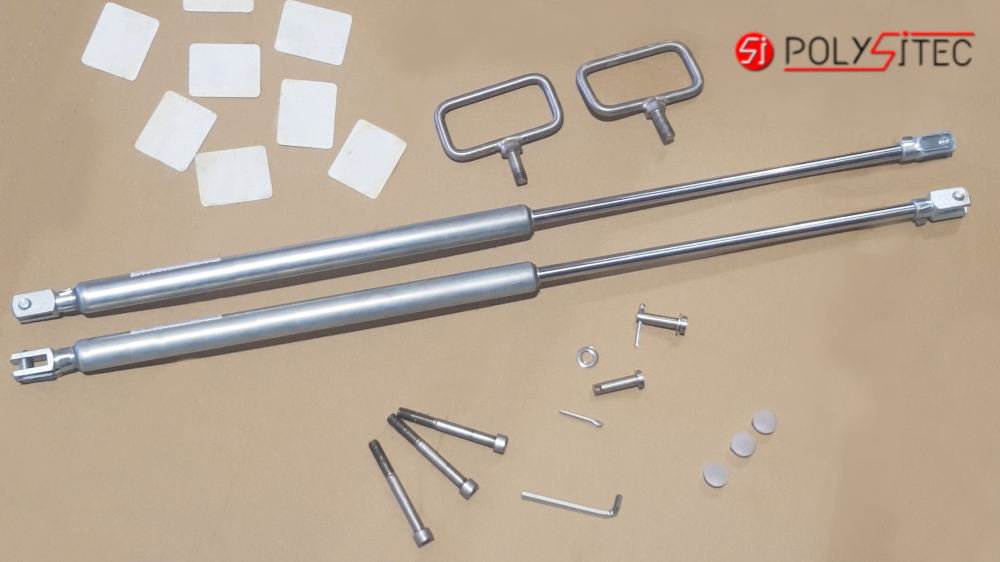
- Accesories assisted cover
-
- Do not disassemble

-
- Do not separate

– If applicable, seal the plastic caps of the nut with silicone. Position and level the entire assembly (DO NOT uncouple, DO NOT remove the tray from the frame), the hinged assembly can be easily opened and manipulated, the gas springs are not mounted.
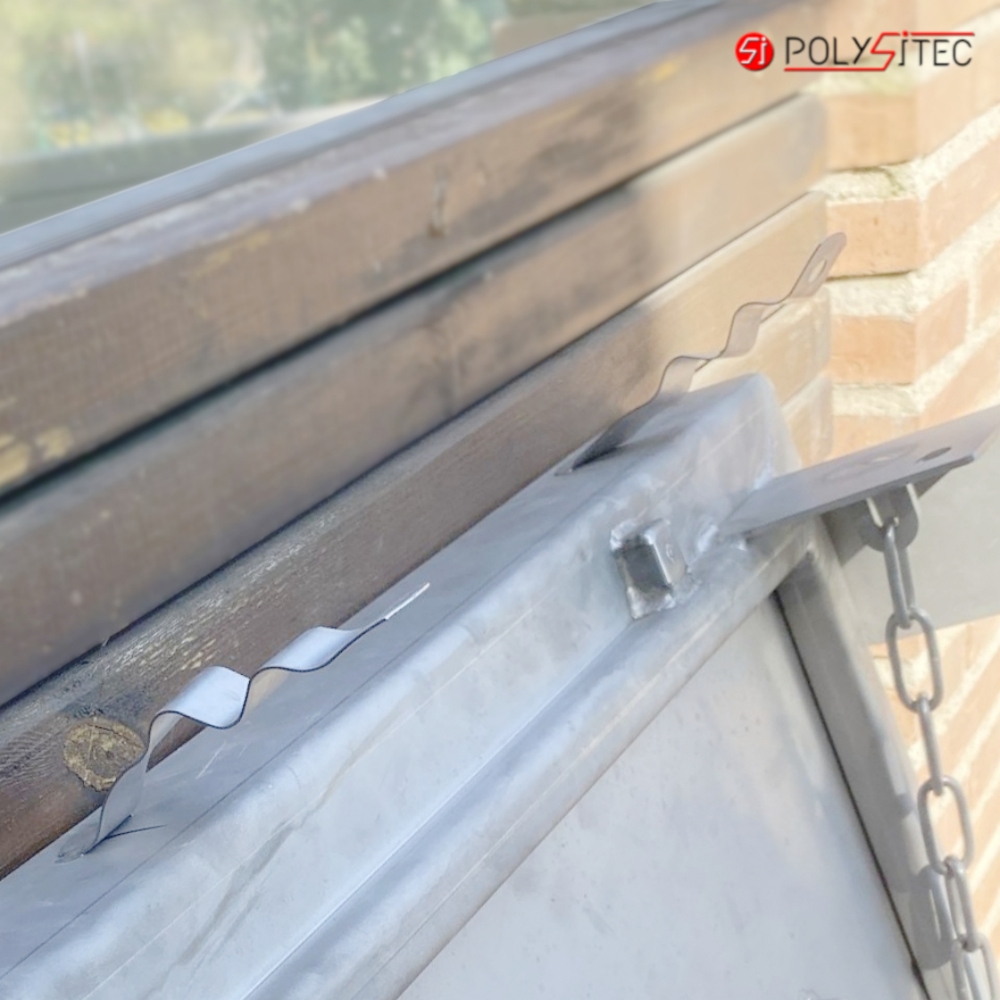
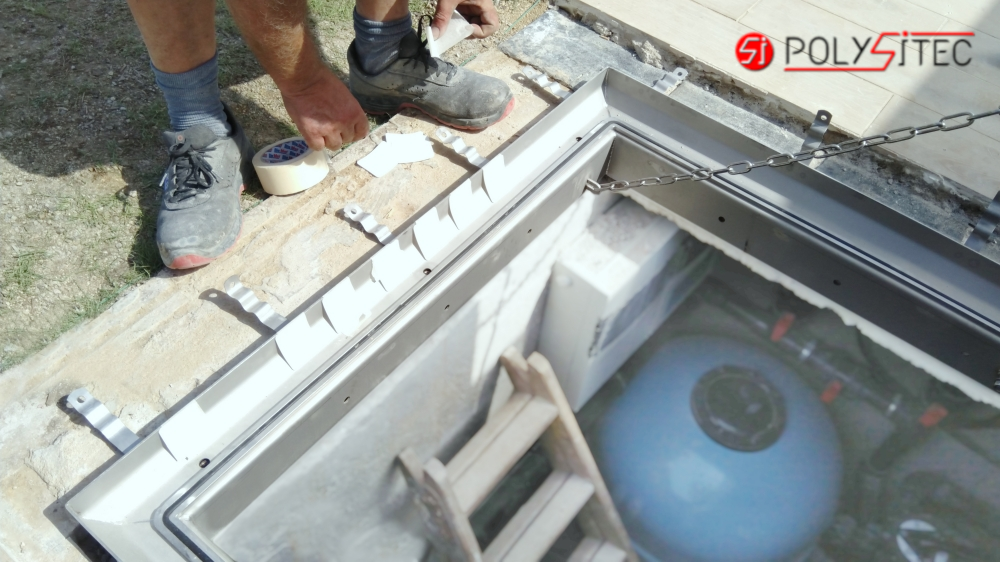
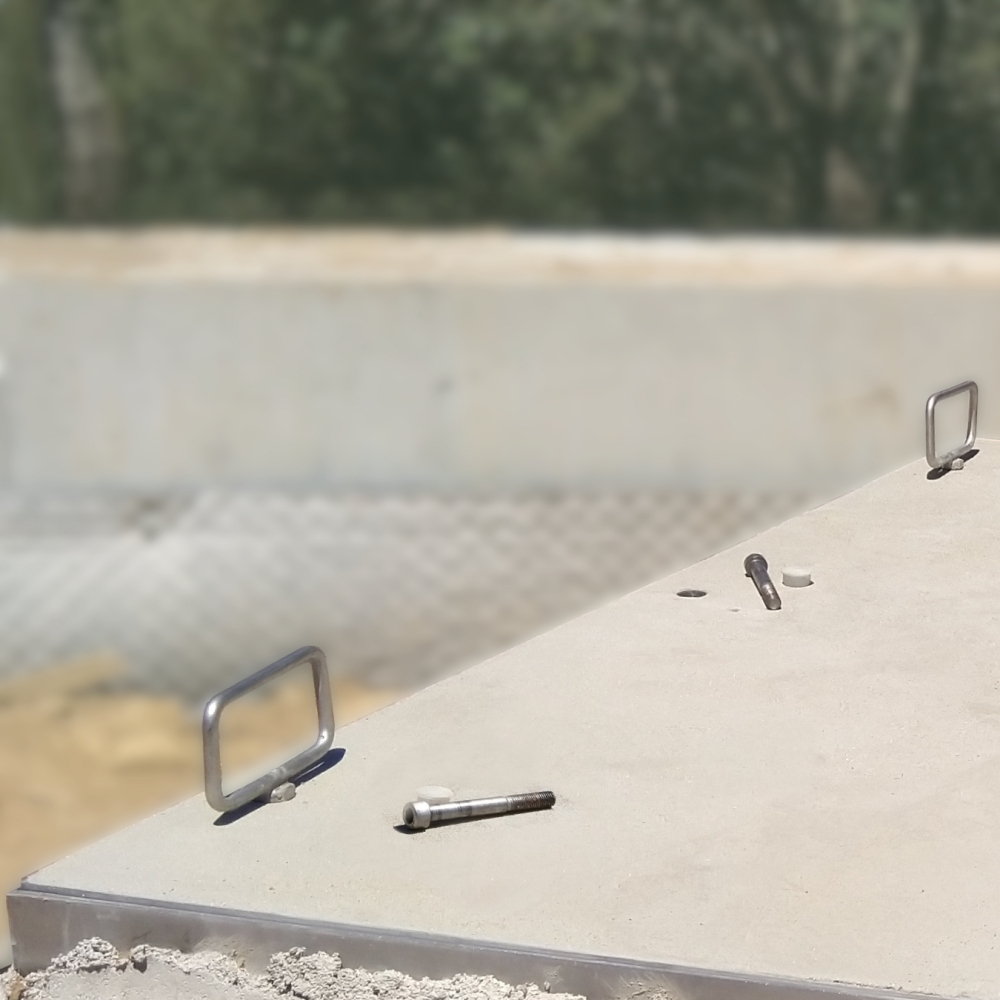
– The plastic gauges to guarantee the clearance between the frame and the refillable tray come inserted at the factory, open the cover and fix them with adhesive tape on the upper edge of the frame, place them perimeter and on the opposite side to the hinges put double.
– Close the fillable tray and screw in completely all the closing screws, thereby guaranteeing the existence of the nuts in the frame. It is not necessary to tighten very hard, apply Vaseline to the threads.
-
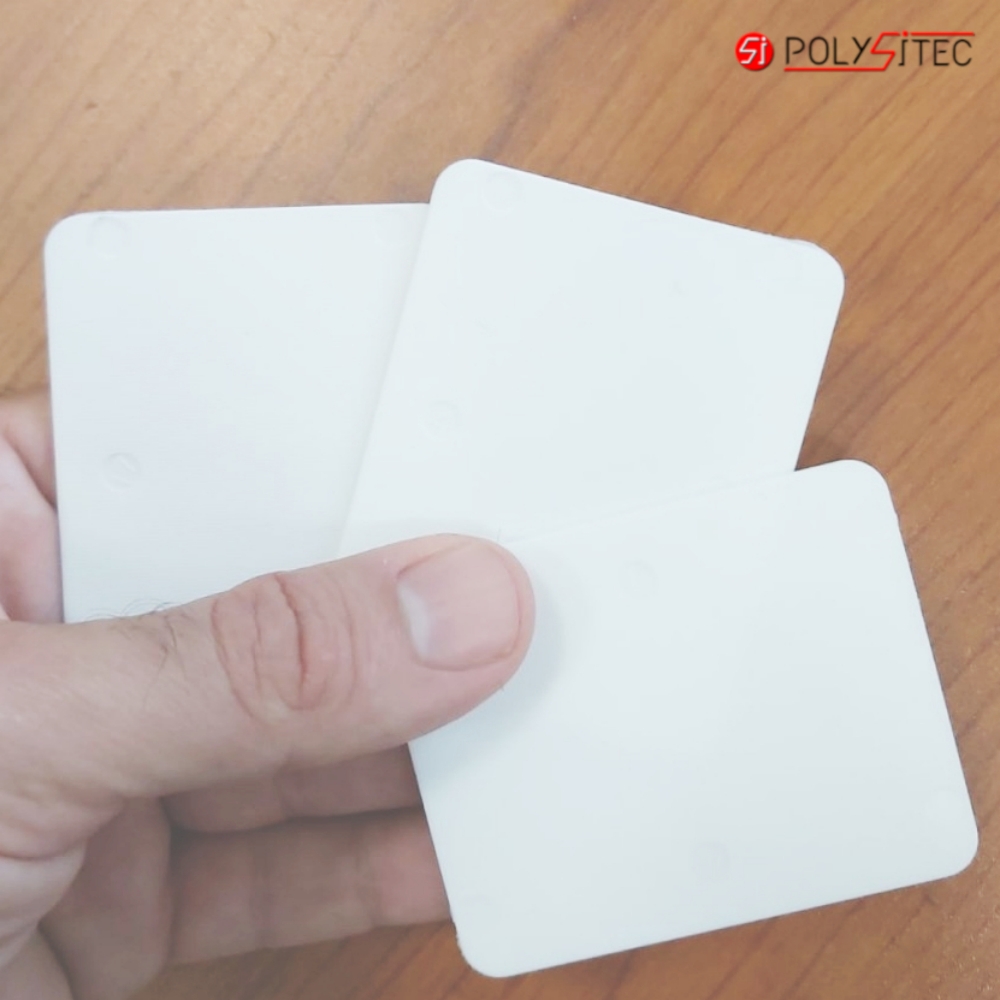
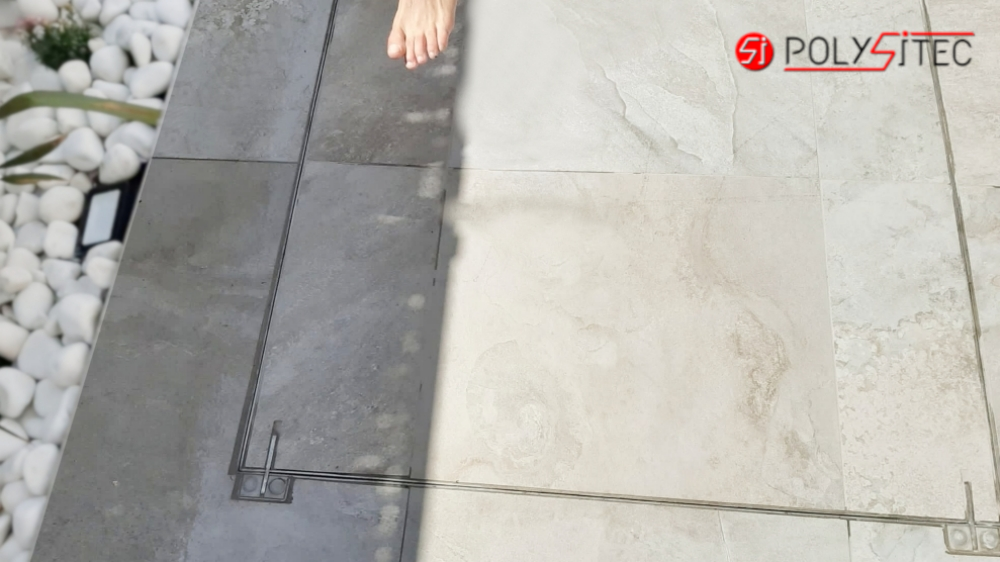
- Gauges 1.5mm.
-
- Inserted gauges
-
- Plastic cap

-
- Inox cap
-
- Waterproof Inox cap
-
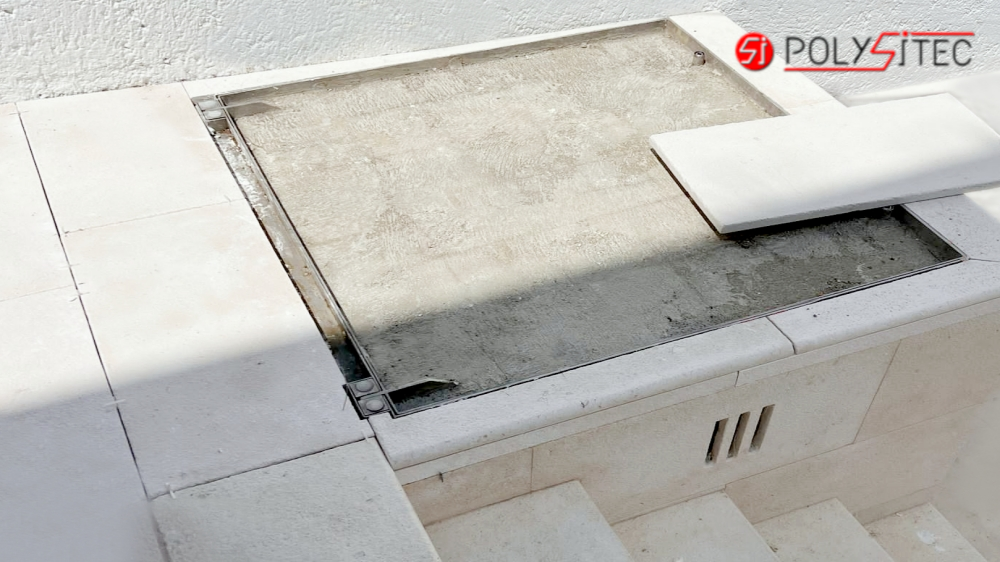
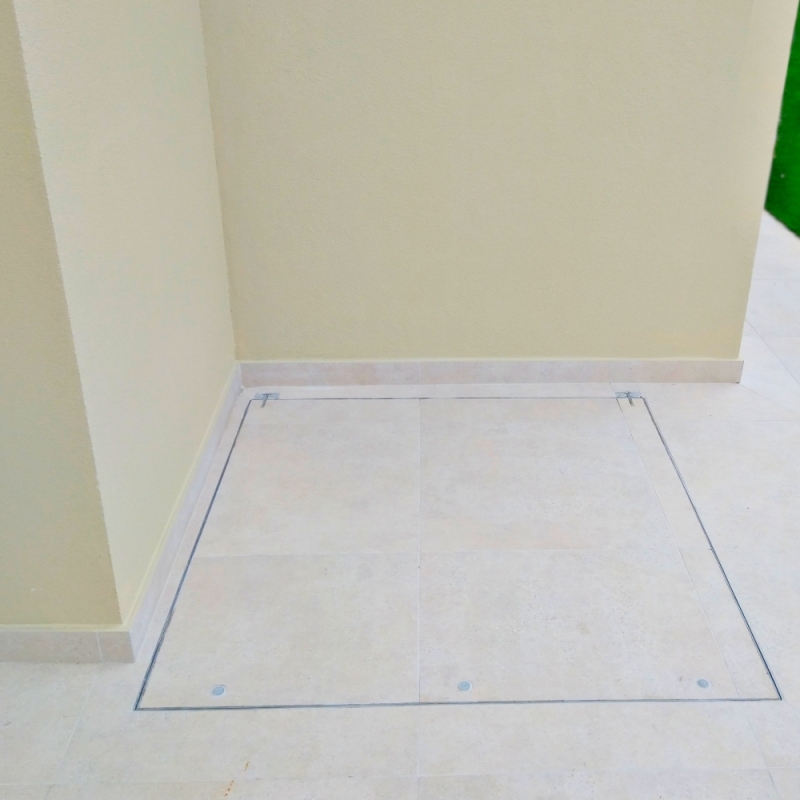
- Placing assisted cover

-
- Placing assisted cover
-
- Placing assisted cover
-
- Placing the gauges
-
- Close and thread screws
– The gauges should always be installed while the concrete formwork of the frame and/or tray is setting. This will prevent friction that could hinder the initial opening. If necessary, the hinge fixing screws can be loosened and then retightened.
– All screws must be fully tightened while the concrete formwork of the frame and/or tray is setting. This ensures proper alignment and a watertight seal.
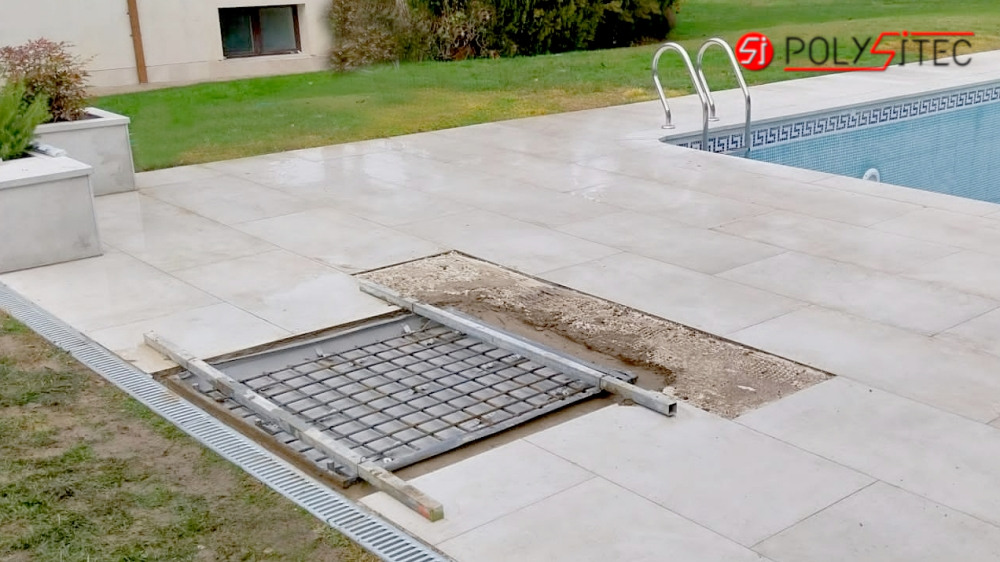
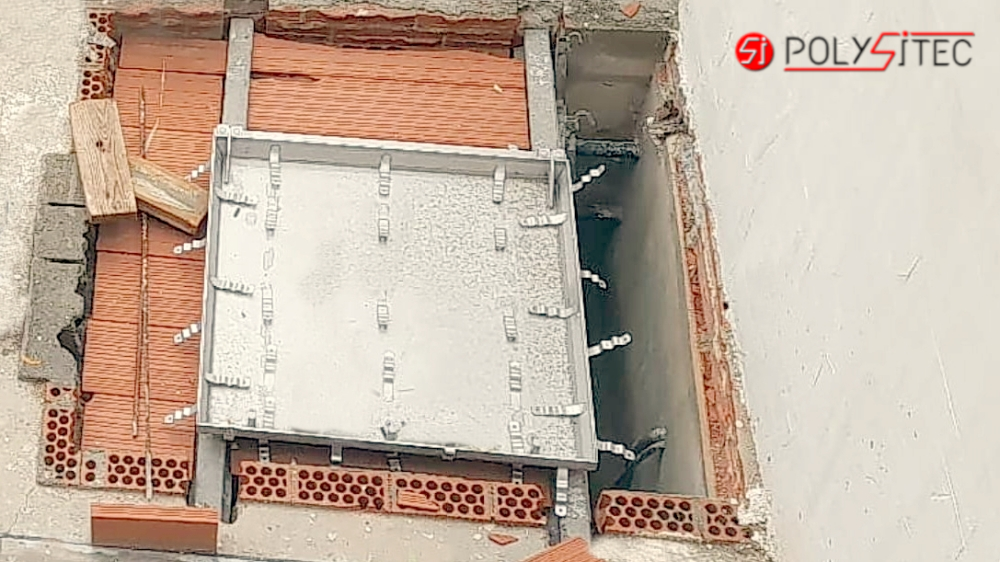
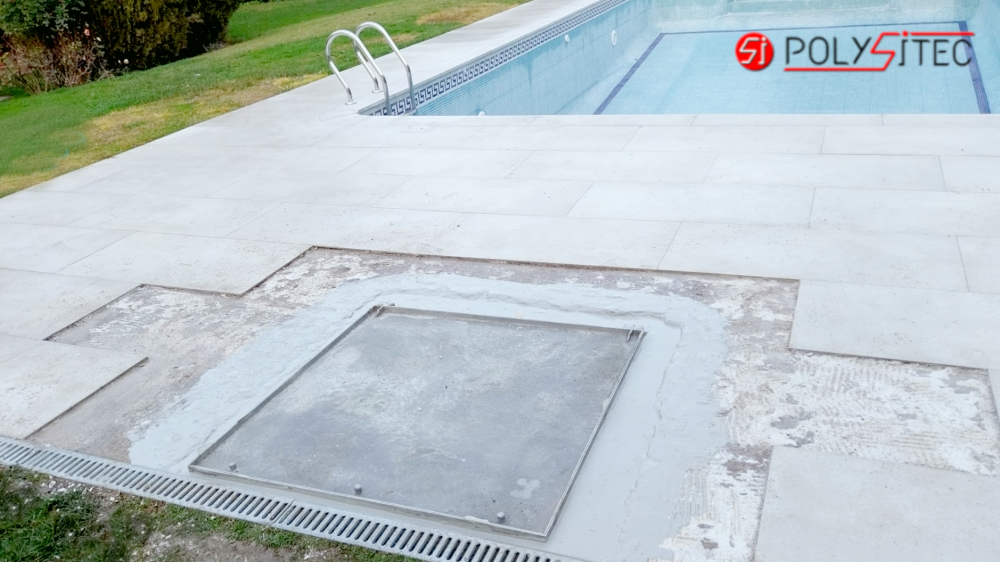
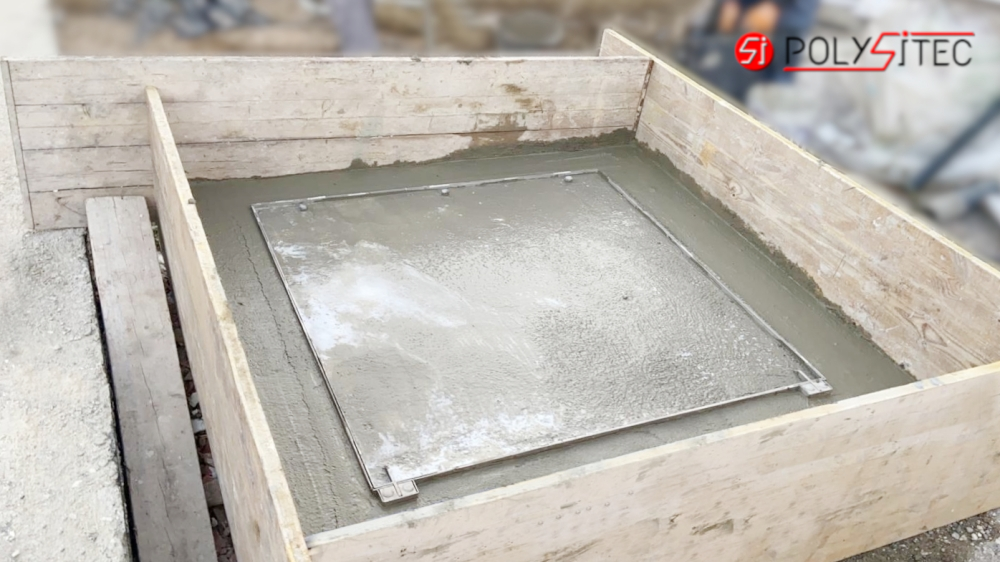
– The frame must be perfectly formwork around its perimeter with C35/40 concrete (not lightweight). The frame can be formwork first, followed by the tray, always joined together and with the gauges, without removing the fillable tray from the frame and respecting the curing times.
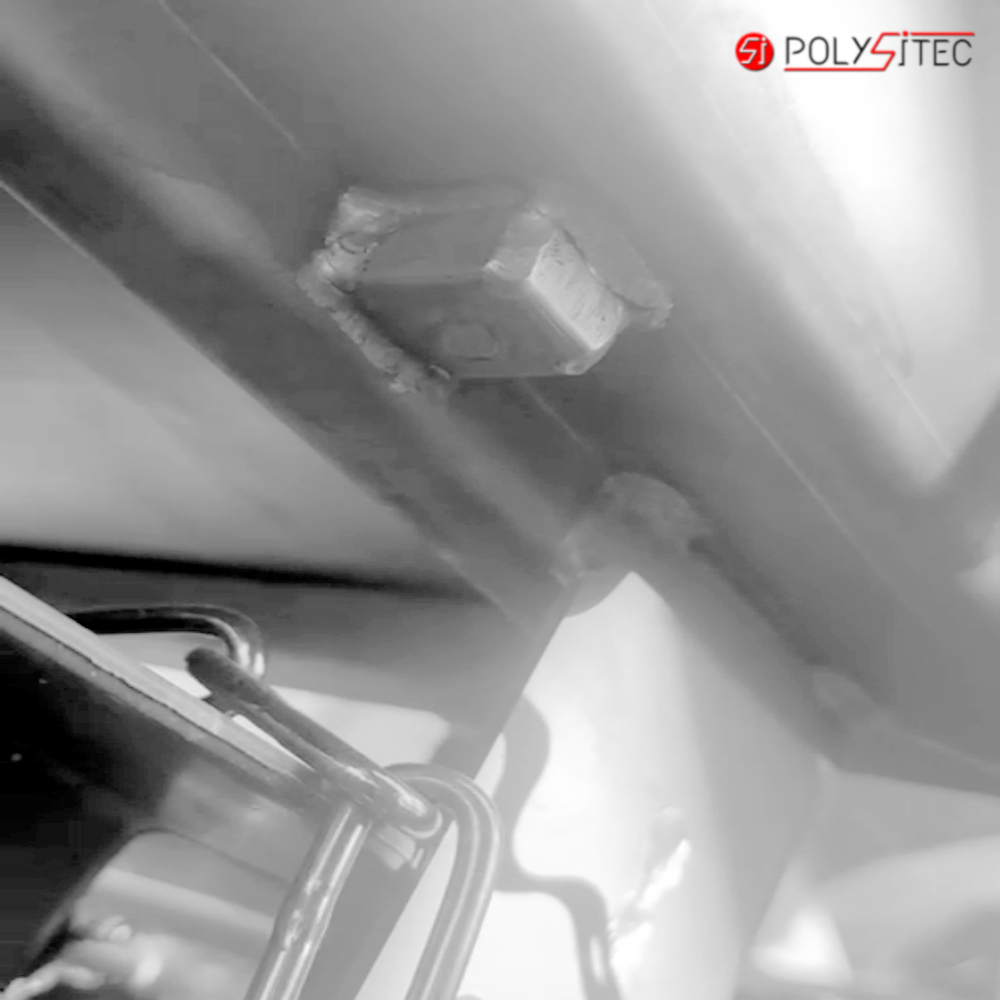
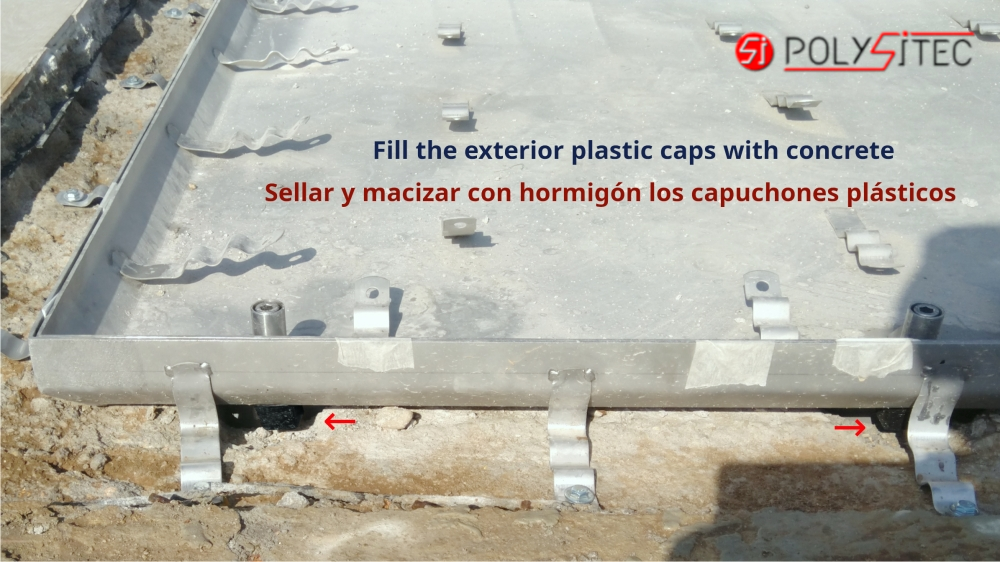
– Fill the exterior of the nut frame caps with concrete. The frame skirt can be secured with stainless steel rods and chemical anchors. Fill the gap between the frame and the internal concrete or brick walls with mortar or a similar material.
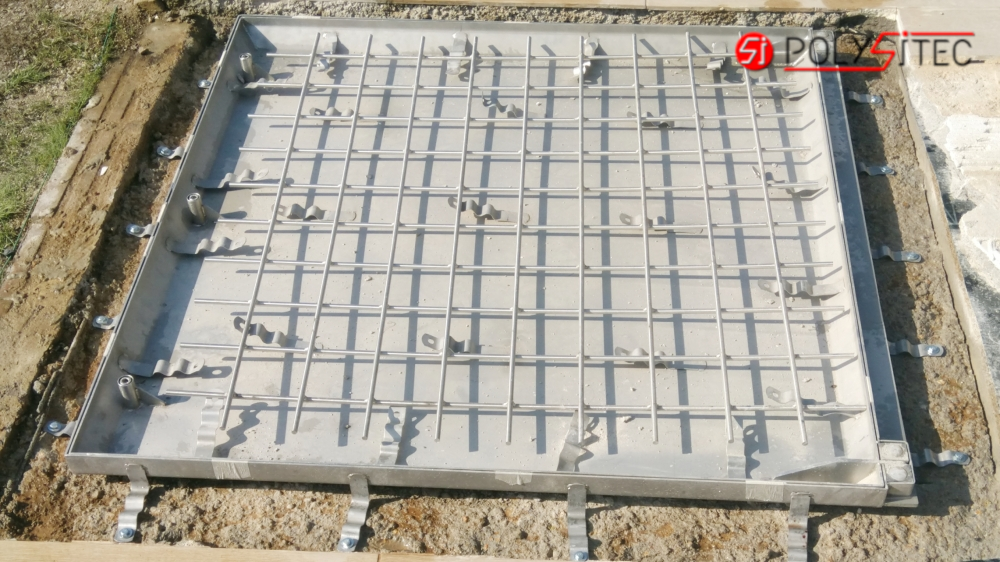
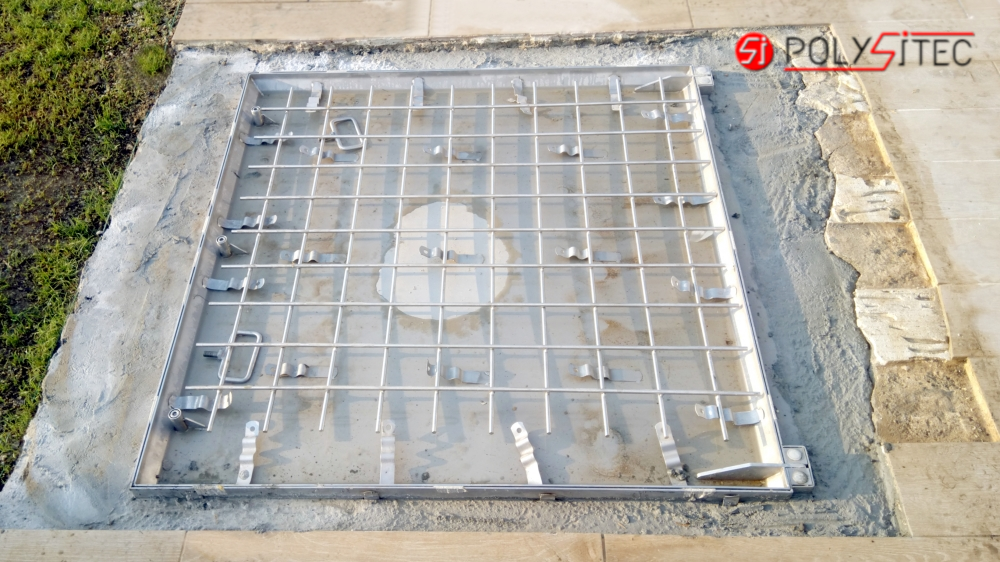
– Secure the mesh to the tray and fill it according to the manufacturer’s specifications. The piston force (N) has been calculated based on the weight of the steel in the tray and the data provided by the customer. DO NOT mix concrete with expanded clay aggregate (Arlita) or similar materials.
-
- Gauges screws tightened
-
- formworking the caps
-
- Frame with C35/40 concrete
-
- Concrete filled tray
-
- One-time formwork
-
- Formwork for grass
-
- Formwork for gres
-
- Formwork in floating floor
-
- Inox anchor skirt

-
- Useful and minimalist
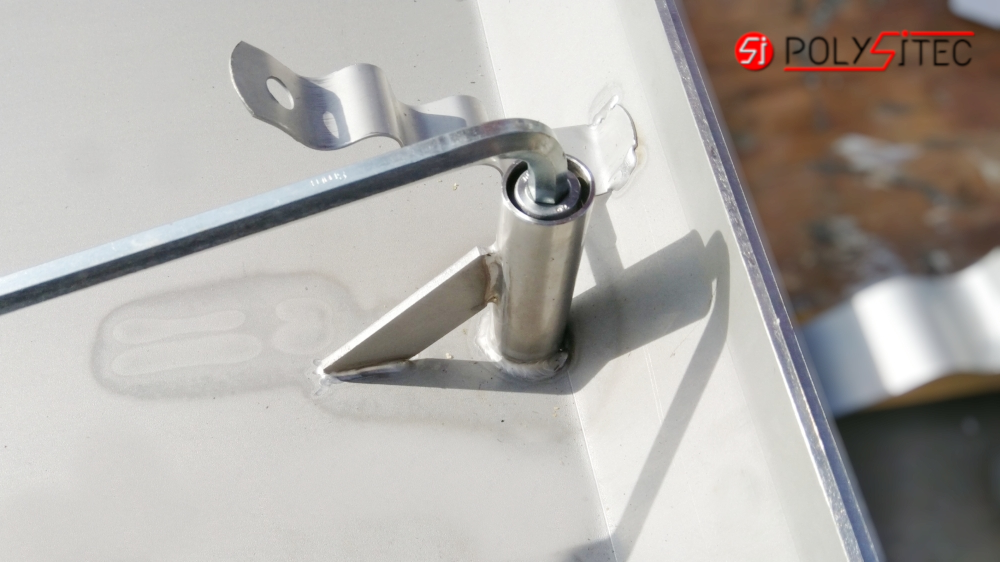
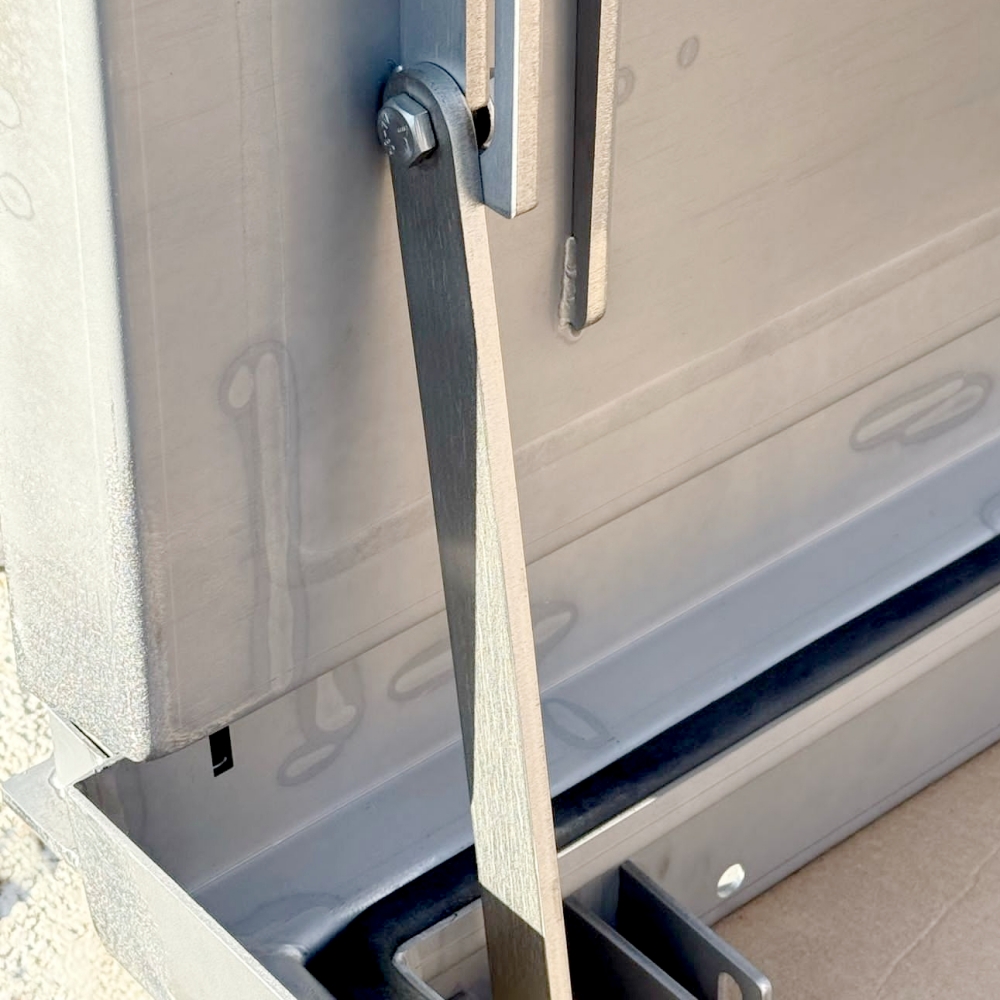
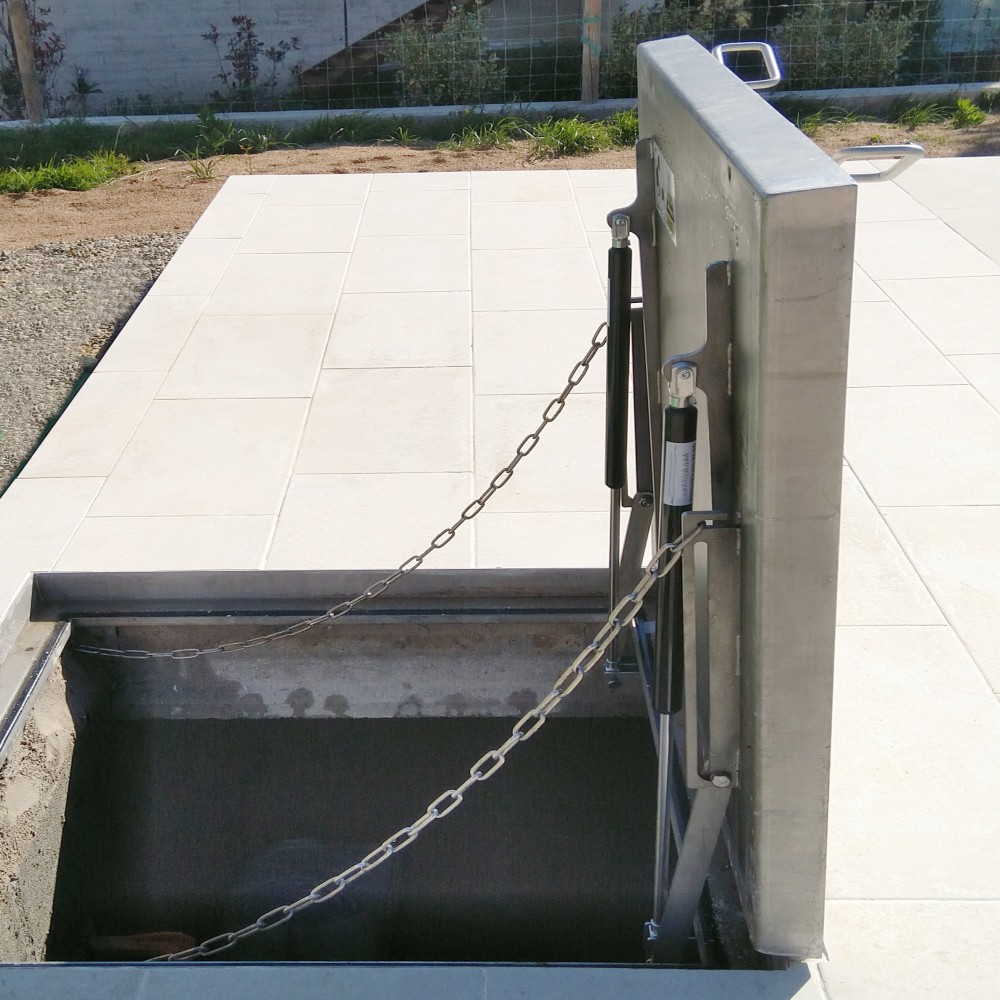
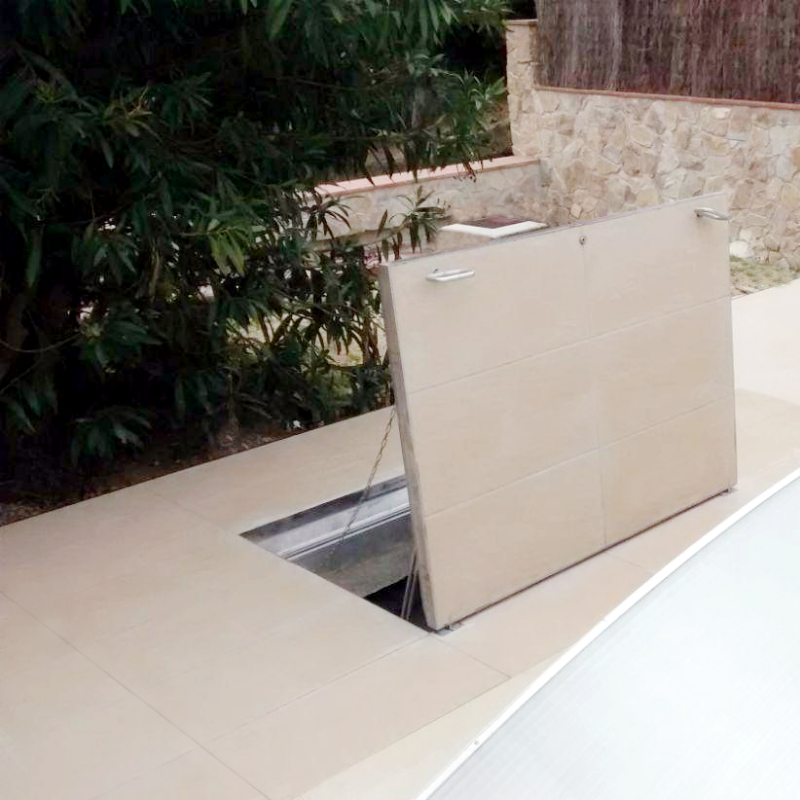
– Remove the Allen screws securing the tray, screw the handles, open the tray, and if applicable, install the automatic locking safety lever (it should move freely). Install the gas pistons with the cylinder body in the refillable tray and adjust the chains to act as an opening stop and anti-tip device. Verify the correct mechanical operation of the entire assembly and its watertightness with the Allen screws tightened; they do not need to be tightened excessively.
– The frame and tray assembly are watertight; therefore, adequate cross-ventilation from the lower to the upper area must be provided in the underground or buried pool house, either naturally or mechanically. We recommend using PVC pipe and fittings with a minimum diameter of 140 mm. Each installation is different, airflow must be ensured to evacuate gases and prevent condensation. In summer, the pool water is warm, while the temperature in the underground area is lower.


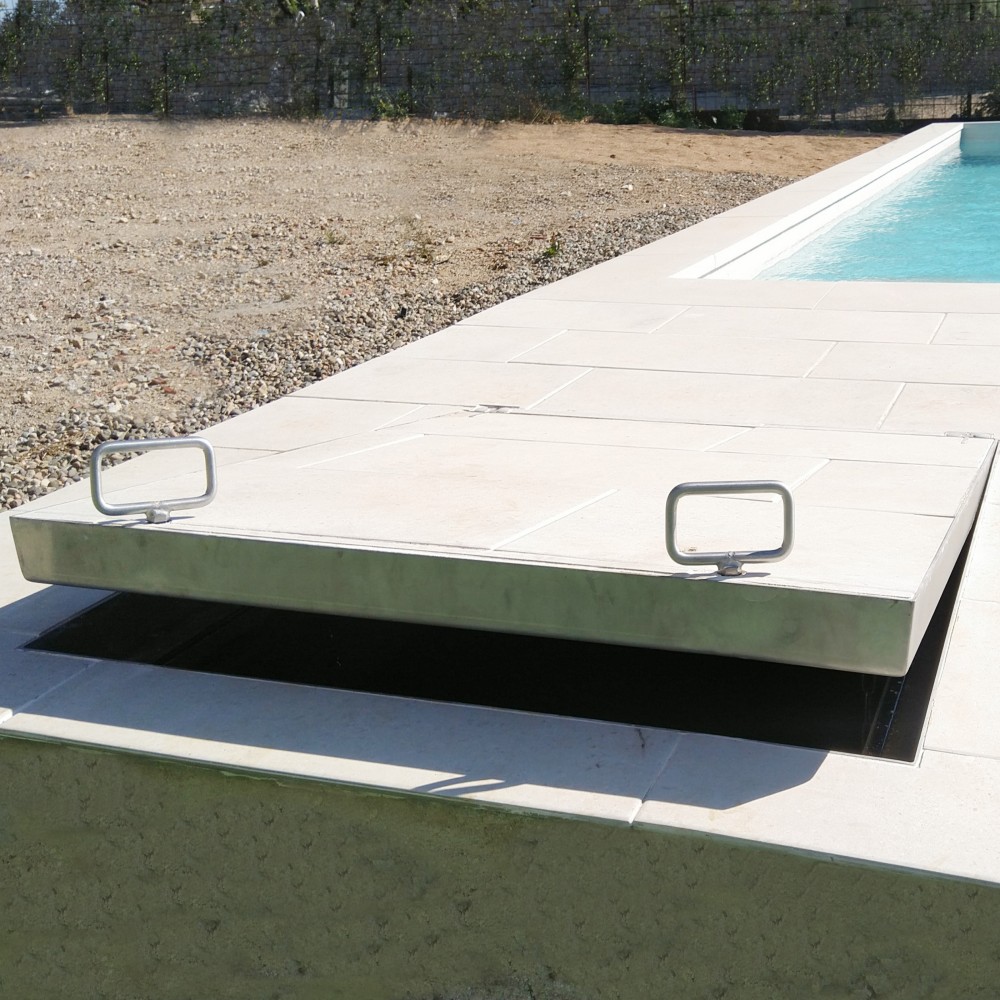
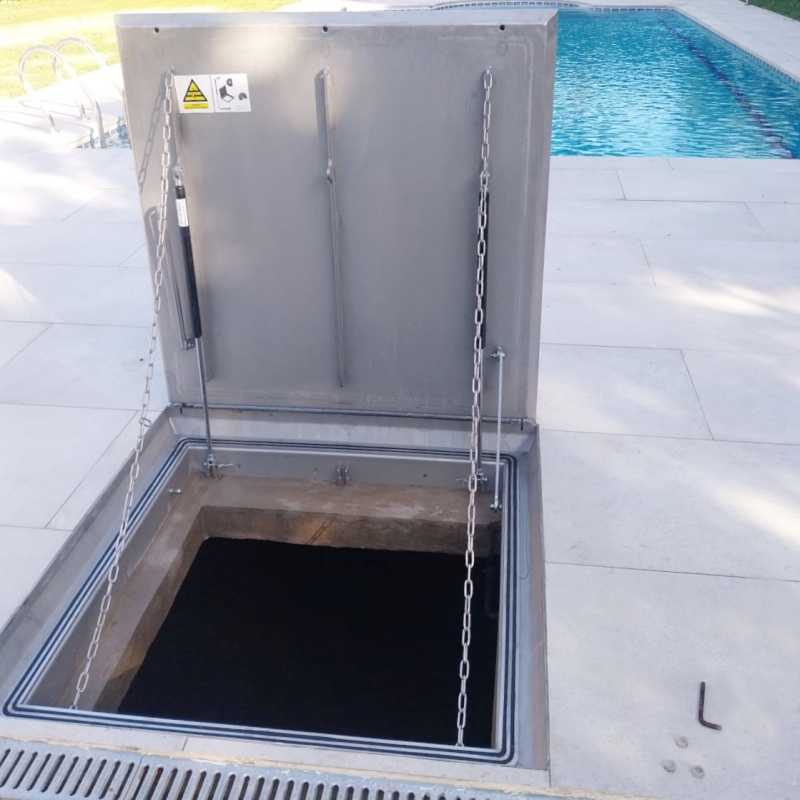

Assisted access cover set, refillable and watertight, Polysitec® K8x8 Premium model for K3 pedestrian traffic, manufactured with 3 mm AISI 316L stainless steel sheet thick. | With folded sheet metal frame with an internal dimensions of 800×800 mm. and height of 170/65 mm, with sealing O-ring housed in the fold of the frame. | With a fillable tray with a filling height of 58 mm, with anchors for the steel mesh and with reinforced hinges screwed into the frame. | With subsequent pickling and immersion passivation of the entire assembly. | With M10 screws (DIN 912) and 2 stainless steel handles of M12. | With anti-roll chains and self-locking anti-fall safety levers, all in 316L stainless steel. | With anchors for 2 pressurized gas pistons and 2 galvanized or painted steel pistons with strength (N) according to the weight of the filling material used.
Assisted access cover set, refillable and watertight, Polysitec® K10x10 Premium model for K3 pedestrian traffic, manufactured with 3 mm AISI 316L stainless steel sheet thick. | With folded sheet metal frame with an internal dimensions of 1.000×1.000 mm. and height of 170/65 mm, with sealing O-ring housed in the fold of the frame. | With a fillable tray with a filling height of 58 mm, with anchors for the steel mesh and with reinforced hinges screwed into the frame. | With subsequent pickling and immersion passivation of the entire assembly. | With M10 screws (DIN 912) and 2 stainless steel handles of M12. | With anti-roll chains and self-locking anti-fall safety levers, all in 316L stainless steel. | With anchors for 3 pressurized gas pistons and 2 galvanized or painted steel pistons with strength (N) according to the weight of the filling material used.
♦ Click to see assisted manhole cover video on Youtube
Conjunto de tampa de acesso assistido, rebaixada para enchimento e estanque, modelo Polysitec® K8x8 Premium, para circulação pedonal K3, fabricadas em chapa de aço inoxidável AISI 316L de 3 mm. espesso. | Com aro em chapa dobrada com medida interna de 1.000×1.000 mm. e altura de 170/65 mm, com O-ring de vedação alojado na dobra da moldura. | Com tabuleiro preenchível com altura de enchimento de 58 mm, com fixações para a malha de aço e com dobradiças reforçadas aparafusadas na aro. | Com posterior decapagem e passivação por imersão de todo o conjunto. | Com parafusos M10 (DIN 912) e 2 asas M12 em aço inoxidável. | Com cadeias anticaida e travas de segurança anti-queda autotravantes, todas em aço inoxidável 316. | Com âncoras para 2 pistões a gás pressurizados e 2 pistões de aço galvanizado ou pintado com resistência (N) de acordo com o peso do material de enchimento utilizado.
Conjunto de tampa de acesso assistido, rebaixada para enchimento e estanque, modelo Polysitec® K10x10 Premium, para circulação pedonal K3, fabricadas em chapa de aço inoxidável AISI 316L de 3 mm. espesso. | Com aro em chapa dobrada com medida interna de 1.000×1.000 mm. e altura de 170/65 mm, com O-ring de vedação alojado na dobra da moldura. | Com tabuleiro preenchível com altura de enchimento de 58 mm, com fixações para a malha de aço e com dobradiças reforçadas aparafusadas na aro. | Com posterior decapagem e passivação por imersão de todo o conjunto. | Com parafusos M10 (DIN 912) e 2 asas M12 em aço inoxidável. | Com cadeias anticaida e travas de segurança anti-queda autotravantes, todas em aço inoxidável 316. | Com âncoras para 3 pistões a gás pressurizados e 2 pistões de aço galvanizado ou pintado com resistência (N) de acordo com o peso do material de enchimento utilizado.